From our sponsor: Leverage AI for dynamic, custom website builds with ease.
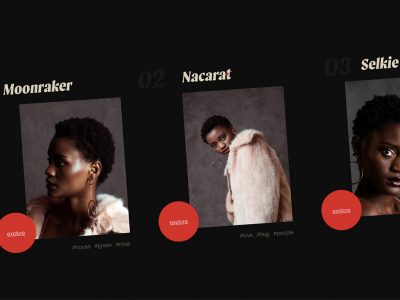
Have you ever stumbled upon a website with captivating visual effects and interactivity? One such website is alcre.co.kr, created by Eum Ray.
In this article, I’ll guide you through my process of creating a similar carousel, using WebGL, react-three-fiber, and GSAP.
The article will be divided into four parts:
- Generating a 3D plane with a texture
- Adding a zoom effect to the plane
- Configuring a carousel of images with mouse scroll and drag functionality
- Implementing post-processing effects to enhance the carousel experience
Part 1: Generating a 3D plane with a texture
Firstly, let’s begin by creating a plane of any size, ensuring that it’s positioned at the origin (0, 0, 0) and facing the camera. We’ll then use a shaderMaterial to insert our desired image into the material, modifying the UV positions to achieve a cover mode texture that fills the entire geometry surface.
To achieve this, we’ll make use of a glsl function that takes the proportions of the plane and image as conversion parameters:
/*------------------------------
Background Cover UV
--------------------------------
u = basic UV
s = plane size
i = image size
------------------------------*/
vec2 CoverUV(vec2 u, vec2 s, vec2 i) {
  float rs = s.x / s.y; // Aspect plane size
  float ri = i.x / i.y; // Aspect image size
  vec2 st = rs < ri ? vec2(i.x * s.y / i.y, s.y) : vec2(s.x, i.y * s.x / i.x); // New st
  vec2 o = (rs < ri ? vec2((st.x - s.x) / 2.0, 0.0) : vec2(0.0, (st.y - s.y) / 2.0)) / st; // Offset
  return u * s / st + o;
}
Next, we’ll define two uniforms: uRes and uImageRes. These uniforms will change whenever the viewport is resized. We’ll use uRes to store the size of the plane in pixels, and uImageRes to store the size of the image texture.
Here’s the code to create the plane and set up the shader material:
Part 2: Adding a zoom effect to the plane
Now that we have our plane, we can proceed to implementing the zoom visual effect.
Let’s set up a new component that will wrap our <Plane /> and enable us to manage the activation and deactivation of the zoom effect.
It’s important to note that using a shader material to resize a mesh maintains the dimensions of the geometry space. Therefore, after activating the zoom effect, we must display a new transparent plane with dimensions equivalent to the viewport, which allows us to click on the entire image and revert to the initial state.
We also need to implement the wave effect within the shader of the Plane.
So we add a new uniform called uZoomScale. This uniform will be used to tell the position of the vertex shader how much to scale the x and y positions of our plane. We’ll calculate the scale by creating a proportion between the plane’s dimensions and those of the viewport:
$mesh.current.material.uniforms.uZoomScale.value.x = viewport.width / width
$mesh.current.material.uniforms.uZoomScale.value.y = viewport.height / height
Next, we’ll add an uniform called uProgress to control the amount of the wave effect. By modifying uProgress using GSAP, we’ll achieve a smooth easing effect for the animation.
To create the wave effect, we’ll use the sin function in the vertex shader. This function will add a wave-like motion to the x and y positions of the plane.
With the addition of the zoom and wave effects, our carousel is starting to take shape.
Part3: Creating a carousel of images that can be moved using mouse scroll or drag
Now comes the most fun, but also the most complicated part, as we have to take into account many things.
First, we need to create an array of <CarouselItem /> with the images we want using renderSlider(). Then, we need to have a plane that manages the slider events using renderPlaneEvents().
The most important part of the carousel is inside useFrame(), where we calculate the slider progress and render all item positions using the displayItems() function.
If you’re not familiar with the mechanism of the component, you can find the same implementation in vanilla JavaScript in a straightforward CodePen that I have developed, which you might find much simpler to follow.
Another important aspect to consider is the z position of the <CarouselItem />. When it becomes active, we need to bring its z position closer to the camera so that the zoom effect does not conflict with the other meshes. This is precisely why, when we exit the zoom, we need the mesh to be small enough to restore its z-axis position to zero (see <CarouselItem />).
And that’s why I disable clicks on the other meshes until the zoom effect is deactivated.
Part 4: Implementing post-processing effects to enhance the carousel experience
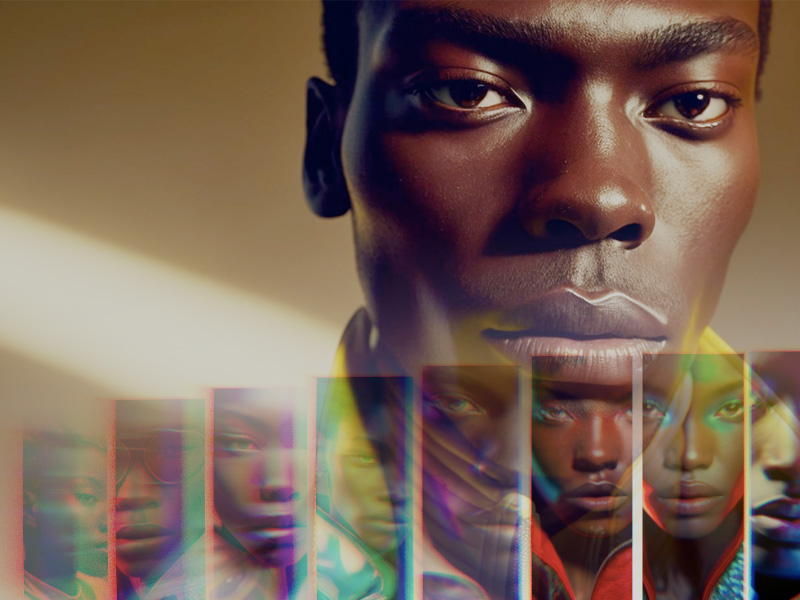
The effect that really caught my eye and inspired me to replicate this carousel was the stretching pixels at the edges of the viewport.
In the past, I’ve recreated this effect multiple times by creating a custom shader with @react-three/postprocessing. However, recently I’ve been playing around with N8Programs‘ new MeshTransmissionMaterial, and I had the idea to try overlaying a mesh with this material and adjusting its settings. The effect was practically identical!
So, the trick was to link the thickness property of the material to the speed of the carousel’s scroll progress, and that’s all there was to it.
In conclusion, by using react-three-fiber, GSAP, and some creativity, it’s possible to create stunning visual effects and interactive components in WebGL, just like the carousel inspired by alcre.co.kr. I hope this article has been helpful and inspiring for your own projects!