
A few months ago my long time Free Software associate, Don Marti, called me about an idea for a WebExtension. WebExtensions is the really cool new standard for browser extensions that Mozilla and the Chrome team are collaborating on (as well as Opera, Edge and a number of other major browsers). The WebExtensions API lets you write add-ons using the same JavaScript and HTML methodologies you use to implement any other web site.
Don’s idea was basically to build a text analysis toolkit with the new WebExtensions API. This toolkit would let you monitor various browser activities and resources (history, bookmarks, etc.) and then let you use text analysis modules to discover patterns in your own browsing history. The idea was to turn the tables on the kinds of sophisticated analysis that advertisers do with the everyday browsing activities we take for granted. Big companies are using advanced techniques to model user behavior and control the content they receive, in order to manipulate outcomes like the time a user spends on the system or the ads they see. If we provided tools for users to do this with their own browsing data, they would have a better chance to understand their own behaviors and and a greater awareness of when external systems are trying to manipulate them.
The other major goal would be to provide a well-documented example of using the new WebExtensions API. The more I read about WebExtensions the more I realized they represent a game-changer for moving web browsing intelligence “out to the edge”. All sorts of analysis and automation can be done with WebExtensions in a way that potentially lets the tools be used on any of the popular modern web browsers. About the only thing I saw missing was a way to easily collaborate around these “recipes” for analysing web content. I suggested we create a WordPress plugin that would supply a RESTful interface for sharing classifications and the basic plan for “FilterBubbler” was born.
Our initial prototype was a proof of concept that used an extremely basic HTML pop-up and a Bayesian classifier. This version proved that we could provide useful classification of web page content based on hand-loaded corpora, but it was clear that we would need additional tooling to get to a “consumer” feel. Before we could start adding important features like remote recipe servers, classification displays and configuration screens, we clearly needed to make some decisions about our infrastructure. In this article, I will cover our efforts to provide a modern UI environment and the challenges that posed when working with WebExtensions.
React/Redux
The React framework and its associated Flux implementation took the HTML UI world by storm when Facebook released the tool as Free Software in 2013. React was originally deployed in 2011 as part of the newsfeed display infrastructure on Facebook itself. Since then the library has found use in Instagram, Netflix, AirBnB and many other popular services. The tool revolves around a strategy called Flux which tightly defines the way state is updated in an application.
Flux is a strategy not an actual implementation, and there are many libraries that provide its functionality. One of the most popular libraries today is Redux. The Redux core value is a simplified universal view of the application state. Because there is a single state for the application, the behavior that results from a series of action events is completely deterministic and predictable. This makes your application easier to reason about, test and debug. A full discussion of the concepts behind React and Redux is beyond the scope of this article so if you are just getting started, I would recommend that you read the Redux introductory material or check out Dan Ambramov’s excellent introductory course at Egghead.
Integrating with WebExtensions
Digging into the WebExtensions framework, one of the first hurdles is that the UI pop-up and config page context is separate from the background context. The state of the UI context is recreated each time you open and close the UI displays. Communication between the UI context and the background script context is achieved via a message-passing architecture.
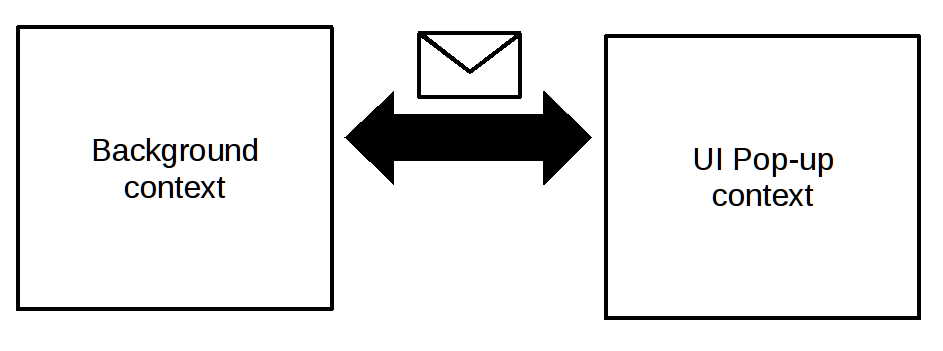
The state of the FilterBubbler extension will be stored in the background context but we’ll need to bind that state to UI elements in the pop-up and config page context. Alexander Ivantsov’s Redux-WebExt project offers one solution for this problem. His tool provides an abstraction layer between the UI and background pages with a proxy. The proxy gives the appearance of direct access to the Redux store in the UI, but it actually forwards actions to the background context, and then sends resulting state modifications generated by the reducers back to the UI context.
Action mapping
It took me some effort to get things working across the Redux-WebExt bridge. The React components that run in the UI contexts think they are talking to a Redux store; in fact, it’s a facade that is exchanging messages with your background context. The action objects that you think are headed to your reducers are actually serialized into messages, sent to the background context and then unpacked and delivered to the store. Once the reducers finish their state modifications, the resulting state is packed up and sent back to the proxy so that it can update the state of the UI peers.
Redux-WebExt puts a mapping table in the middle of this process that lets you modify how action events from the front-end get delivered to the store. In some cases (i.e., asynchronous operations) you really need this mapping to separate out actions that can’t be serialized into message objects (like callback functions).
In some cases this may be a straight mapping that only copies the data from a UI action event, like this one from FilterBubbler’s mappings in store.js:
actions[formActionTypes.TOUCH] = (data) => {
    return { type: formActionTypes.TOUCH, ...data };
}
Or, you may need to map that UI action to something completely different, like this mapping that calls an asynchronous function only available in the background store:
actions[UI_REQUEST_ACTIVE_URL] = requestActiveUrl;In short, be mindful of the mapper! It took me a few hours to get my head wrapped around its purpose. Understanding this is critical if you want to use React/Redux in your extension as we are.

This arrangement makes it possible to use standard React/Redux tooling with minimal changes and configuration. Existing sophisticated libraries for form-handling and other major UI tasks can plug into the WebExtension environment without any knowledge of the underlying message-based connectivity. One example tool we have already integrated is Redux Form, which provides a full system for managing form input with validation and the other services you would expect in a modern development effort.
Having established that we can use a major UI toolkit without starting from scratch, our next concern is to make things look good. Google’s Material Design is one popular look and feel standard and the React platform has the popular Material UI, which implements the Google standard as a set of React/Redux components. This gives us the ability to produce great looking UI popups and config screens without having to develop a new UI toolkit.
Get thunky
Some of the operations we need to perform are callback-based, which makes them asynchronous. In the React/Redux model this presents some issues. Action generator functions and reducers are designed to do their work immediately when called. Solutions like providing access to the store within an action generator and calling dispatch in a callback are considered an anti-pattern. One popular solution to this problem is the Redux-Thunk middleware. Adding Redux-Thunk to your application is easy, you just pass it in when you create the store.
import thunk from 'redux-thunk'
const store = createStore(
    reducers,
    applyMiddleware(thunk))
With Redux-Thunk installed you are provided with a new style of action generators in which you return a function to the store that will later be passed a dispatch function. This inversion of control allows Redux to stay in the driver’s seat when it comes to sequencing your asynchronous operations with other actions in the queue. As an example, here’s a function that requests the URL of the current tab and then dispatches a request to set the result in the UI:
export function requestActiveUrl() {
    return dispatch => {
        return browser.tabs.query({active: true}, tabs => {
            return dispatch(activeUrl(tabs[0].url));
        })
    }
}
The activeUrl() function looks more typical:
export function activeUrl(url) {
    return {
        type: ACTIVE_URL,
        url
    }
}
Since WebExtensions span several different contexts and communicate with asynchronous messaging, a tool like Redux-Thunk is indispensable.
Debugging WebExtensions
Debugging WebExtensions presents a few new challenges that work a little differently depending on the browser you are using. Whichever browser you use, the first major difference is that the background context of the extension has no visible page and must be specifically selected for debugging. Let’s walk through getting started with that process on Firefox and Chrome.
Firefox
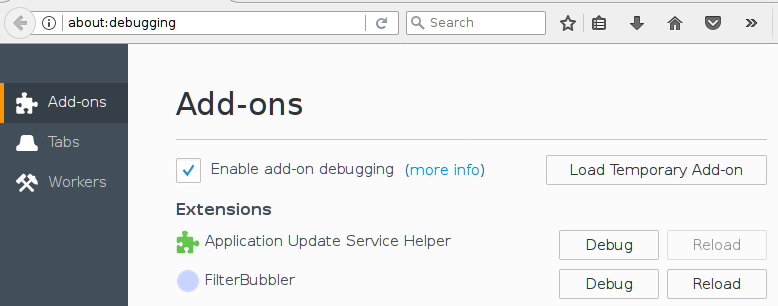
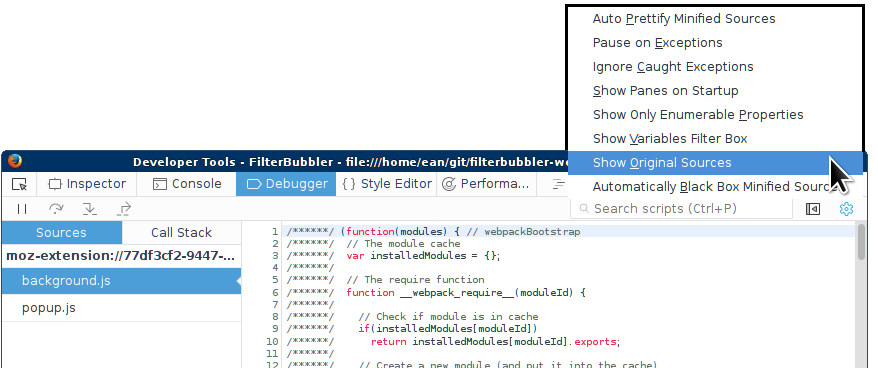
On Firefox, you can access your extension by typing “about:debugging” into the browser’s URL field. This page will allow you to load an unpacked extension with the “Load Temporary Add-On” button (or you can use the handy web-ext tool that allows you to start the process from the command line). Pressing the “Debug” button here will bring up a source debugger for your extension. With FilterBubbler, we are using the flexible webpack build tool to take advantage of the latest JavaScript features. Webpack uses the babel transpiler to convert new JavaScript language features into code that is compatible with current browsers. This means that the sources run by the browser are significantly altered from their originals. Be sure to select the “Show Original Sources” option from the preferences menu in the debugger or your code will seem very unfamiliar!
Once you have that selected you should see something more like what you expect:
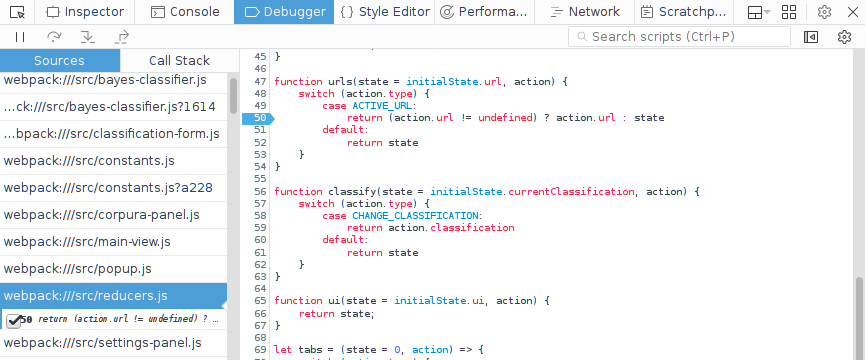
From here you can set breakpoints and do everything else you would expect.
Chrome
On Chrome it’s all basically the same idea, just a few small differences in the UI. First you will go to the main menu, dig down to “more tools” and then select “extensions”:
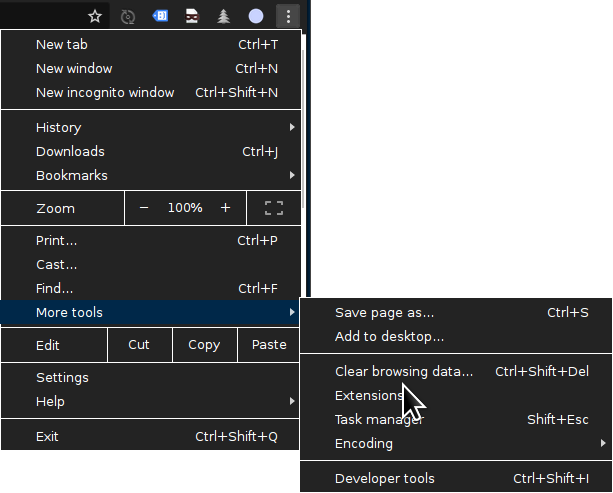
That will take you to the extension listing page.
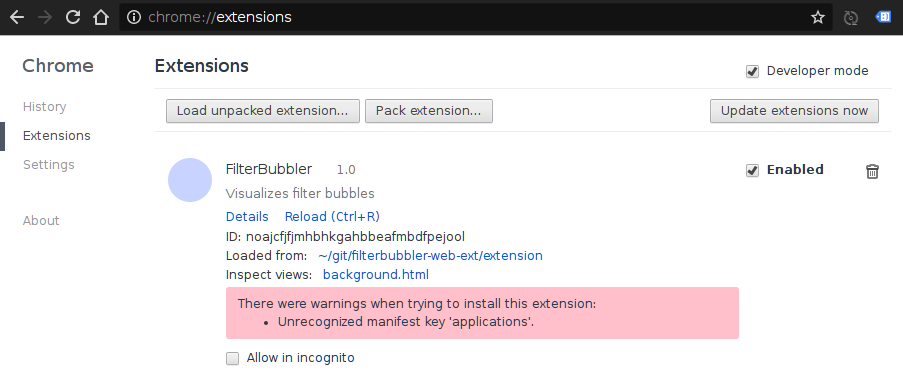
The “Inspect views” section will allow you to bring up a debugger for your background scripts.
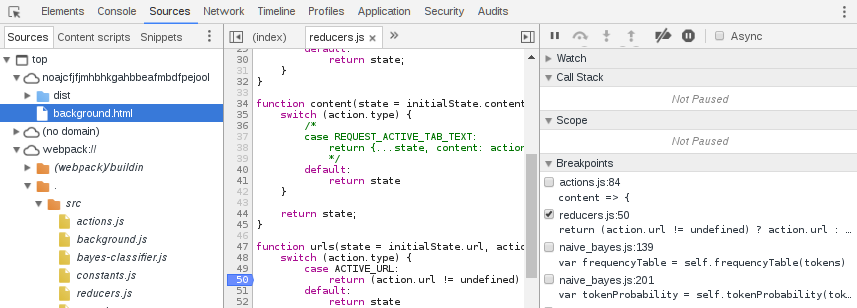
Where the Firefox debugger shows all of your background and foreground activity in one place, the Chrome environment does things a little differently. The foreground UI view is activated by right-clicking the icon of your WebExtension and selecting the “Inspect popup” option.

From there things are pretty much as you would expect. If you have written JavaScript applications and used the browser’s built-in functionality then you should find things pretty familiar.
Classification materials
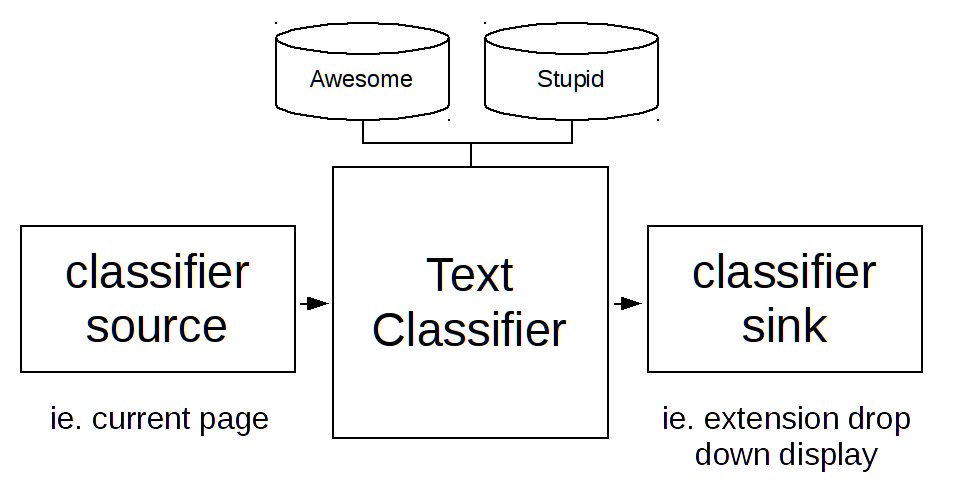
With all our new infrastructure in place and a working debugger we were back on track adding features to FilterBubbler. One of our goals for the prototype is to provide the API that recipes will run in. The main ingredients for FilterBubbler recipes are:
One or more sources: A source provides a stream of classification events on given URLs. The prototype provides a simple source which will emit a classification request any time the browser switches to a particular page. Other possible sources could include a source that scans a social network or a newsfeed for content, a stream of email messages or a segment of the user’s browser history.
A classifier: The classifier takes content from a source and returns at least one classification label with a strength value. The classifier may return an array of label and strength value pairs. If the array is empty then the system assumes that the classifier was not able to produce a match.
One or more corpora: FilterBubbler corpora provide a list of URLs with label and strength values. The labels and strength values are used to train the classifier.
One or more sinks: A sink is the destination for the classification events. The prototype includes a simple sink that connects a given classifier to a UI widget, which displays the classifications in the WebExtensions pop-up. Other possible sinks could generate outbound emails for certain classification label matches or a sink that writes URLs into a bookmark folder named with the classification label.
Maybe a diagram helps. The following configuration could tell you whether the page you are currently looking at is “awesome” or “stupid”!
Passing on the knowledge
The configurations for these arrangements are called “recipes” and can be loaded into your local configuration. A recipe is defined with a simple JSON format like so:
{
    “recipe-version”: “0.1”,
    “name”: “My Recipe”,
        “classifier”: “naive-bayes”,
        “corpora”: [
        “http://mywpblog.com/filterbubbler/v1/corpora/fake-news”,
        “http://mywpblog.com/filterbubbler/v1/corpora/ufos”,
        “http://mywpblog.com/filterbubbler/v1/corpora/food-blog”
    ],
    “source”: [ “default” ],
    “sink”: [ “default” ]
}
The simple bit of demo code above can help a user differentiate between fake news, UFO sightings and food blogs (more of a problem than you might expect in some cities). Currently the classifiers, sources and sinks must be one of the provided implementations and cannot be loaded dynamically in the initial prototype. In upcoming articles, we will expand this functionality and describe the challenges these activities present in the WebExtensions environment.
References
FilterBubbler on GitHub: https://github.com/filterbubbler/filterbubbler-web-ext
React based Material UI: http://www.material-ui.com/
Redux WebExt: https://github.com/ivantsov/redux-webext
Redux Form: http://redux-form.com/6.7.0/
Mozilla browser polyfill: https://github.com/mozilla/webextension-polyfill
About Ean Schuessler
I help businesses create beautiful and powerful solutions using Free Software. I am a long-time participant in the Debian project and collaborated in the creation of the Debian Social Contract which inspired the Open Source Definition. I served as President of Software in the Public Interest, an umbrella that holds property and provides services for Debian and other Free Software development efforts. I am an active participant in Free Software based Java. I believe in the promise of Open Source ERP and am a long time participant in the Apache OFBiz effort. I have given talks at various conferences including JavaOne, Apachecon, OSCON and FISL in Brazil. Most recently I visited Java Users Groups throughout the Southwest US to speak about WebExtensions and isomorphic applications.