In 2016, there’s no doubt the ‘card-based’ design pattern is an important instrument in a modern web developer’s toolbelt.
Cards have been used with great success in most social and sharing websites and applications (Dribbble, Twitter, Facebook, Pinterest, Trello, etc.), and especially in mobile design. Their compactness, portability, and high flexibility give developers a convenient way to build responsive layouts and easily adapt the content to different contexts.
You can employ cards in a wide variety of scenarios such as listing blog posts, recipe articles, product overviews, features highlights, making self-contained widgets, etc. For a more in detail overview of what cards are and why you should use them see this article.

Today we’ll explore two examples of the card-based design pattern implemented
- an image album
- and a recipe widget
We’re going to use Semantic UI, which is one of the most popular and easy-to-use CSS frameworks and provides a ready-to-use Card component out-of-the-box. Any designer with some familiarity with HTML/CSS should have no problem following this tutorial.
Before we get started with the examples make sure you have prepared two empty HTML files, each one with references to jQuery (jquery.js) and Semantic UI (semantic.css, semantic.js). You can link them from a CDN if you don’t want to download them.
<!DOCTYPE HTML>
<html>
<head>
    <meta charset="utf-8" />
    <title>Semantic UI CDN</title>
    <link rel="stylesheet" href="https://cdnjs.cloudflare.com/ajax/libs/semantic-ui/1.11.8/semantic.min.css"/>
    <script src="https://cdnjs.cloudflare.com/ajax/libs/jquery/2.1.3/jquery.min.js"></script>
    <script src="https://cdnjs.cloudflare.com/ajax/libs/semantic-ui/1.11.8/semantic.min.js"></script>
</head>
<body>
      <!-- Your Semantic UI Code -->
</body>
</html>
Example 1: A Simple Image Album
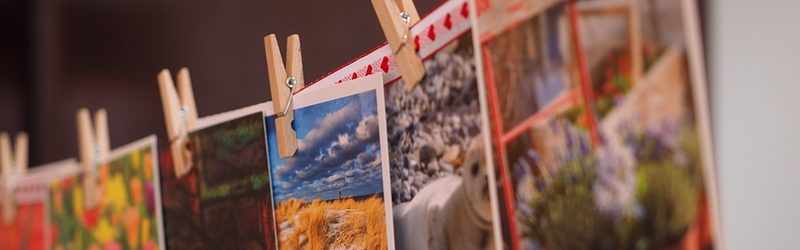
For the first example, let’s suppose we need an application to store and manage our images grouped in separate albums. We also want each album to looks like a stack of images. To achieve that effect, add the following code in your first HTML file:
<div id="album">
  <div class="ui piled compact segment">
  <div class="floating ui red label">9</div>
    <div class="ui card">

       <!-- Album Card Content -->

    </div>
  </div>
</div>
We wrap the album with a <div id="album"> tag. Then, we use a Segment component, which makes the album to appear as a stack of images. We also put a label at top-right corner displaying how many images the album contains. And finally, we add an empty Card component.
At this stage, we need some CSS to give a little breathing space around the album and to distinguish it from the background:
body {
  margin: 30px;
  background-color: whitesmoke;
}
Right now, the album looks a bit strange. But don’t worry, we’ll get it into a shape in a minute.
We want to have a front image showing the first image from the album. When we hover over that image, it will be dimmed and a button will appear in the center. When we click the button we’ll go inside the album. We do all this by adding the following code inside the empty Card component.
<div class="blurring dimmable image">
  <div class="ui inverted dimmer">
   <div class="content">
     <div class="center">
       <div class="ui red button view">VIEW</div>
     </div>
   </div>
  </div>
  <img src="http://mrg.bz/IxQIgC">
</div>
To activate the Dimmer component, which we use above, we need to add the following jQuery code:
$( document ).ready(function() {
  $('.ui.card .image').dimmer({on: 'hover'});
});
The album looks better now, but the VIEW button does nothing. For now, just leave it as it is, we’ll activate it a bit later.
Let’s continue building the album “face” by adding the following code:
<div class="content">
  <div id="rate" class="ui star rating right floated" data-rating="3"></div>
  <div class="header">Animals</div>
  <div class="meta">
    <span class="date"><i class="calendar icon"></i>Created 7/27/2014</span>
    <span class="right floated date"><i class="history icon"></i> Modified 8/4/2014</span>
  </div>
  <div class="description">
  Different animals from around the world
  </div>
</div>
Here, we use the content class to group a header, meta, and description elements, which represent the title of the album, album details such as when the album is created and when is modified, and a short description of the album content. Also, we add a Rating component aligned to the right of the title. To activate it and make it visible, we use jQuery again:
$('.ui.rating').rating({maxRating: 5});You may notice that the album details are too big and don’t fit on one line. We’ll fix this at the end when all cards are created.
We continue by adding two buttons at the bottom of the album card:
<div  class="extra content" >
  <div class="ui right labeled button" data-content="Like it!" data-variation="tiny">
    <div class="ui red icon tiny button">
      <i class="thumbs outline up large icon"></i>
    </div>
    <a class="ui basic red left pointing label">365</a>
  </div>
  <div class="ui left labeled right floated button" data-content="Share it!" data-variation="tiny">
    <a class="ui basic red right pointing label">183</a>
    <div class="ui red icon tiny button">
      <i class="external share large icon"></i>
    </div>
  </div>
</div>
Here, we use two complex buttons, wrapped in an extra content class – one to like the album and one to share it. Also, we need a tooltip for each button, so we add a data-content attribute containing the tooltip’s message. And again, to activate the Popup component we use this jQuery code:
$('.ui.button').popup();
Now, the “face” of the album is ready and it’s time to build the inner view for the album images. We add the following code, but this time after (outside) the <div id="album"> tag:
<div id="album_items">
  <button class="ui labeled icon button back">
    <i class="arrow lircle left icon"></i>Back
  </button>
  <div class="ui cards">

    <!-- Album Images Cards -->

  </div>
</div>
Here, we wrap the album images with a <div id="album_items"> tag, and we add a button to get back to the album “face”. Then, we add <div class="ui cards"> tag whose purpose is to hold the individual image cards. We also put the following CSS to hide initially the album images and to give some space around them:
#album_items {
  display: none;
}

#album_items .ui.cards {
  margin: 10px;
}
Now, it’s time to make the VIEW button working. We add the following code:
$('.button.view').on('click', (function() {
  $('#album').fadeOut('slow', function () {
    $('#album_items').fadeIn('slow');
  });
}));

$('.button.back').on('click', (function() {
  $('#album_items').fadeOut('slow', function () {
    $('#album').fadeIn('slow');
  });
}));
Good. If you try it now you’ll see it is working. But there is nothing to show in the album yet. So, let’s start adding the image cards. Here is the code for the first card:
<div class="card">
  <div class="image">
    <img src="http://mrg.bz/IxQIgC">
  </div>
  <div class="content">
    <div class="header">giraffes.jpg</div>
    <div class="meta">263 KB</div>
  </div>
  <div class="ui bottom attached basic buttons">
    <button class="ui button"><i class="pencil icon"></i></button>
    <button class="ui button"><i class="trash icon"></i></button>
  </div>
</div>
For each image card, we add the image itself, a content section with image’s title and size, and two buttons for image editing and deleting. We do this eight more times until we have 9 card images in the album, as this is denoted in the album label at the top-right corner. (See the final result below for reference about the other eight cards)
The last thing we need to do is to tweak a bit the appearance of the image cards. To do that, we use the following CSS:
.ui.cards > .card  {
  width: 210px;
}

.ui.cards > .card > .content > .header:not(.ui) {
  font-size: 1.1em;
  font-weight: normal;
}

.ui.cards > .card .meta,
.ui.card .meta {
  font-size: 0.8em;
}
Now everything should work and display correctly. You can see the final result here JS Bin
JS Bin on jsbin.comExample 2: The Recipe Widget
NOTE: The content for the recipe is taken from here.
For the second example, let’s suppose we want to create a recipe widget containing the recipe image, name, description, and some details (preparation time, the number of servings, and difficulty level) on its front card. When we hover over the card, the main content will hide revealing another card with two lists: one for the recipe’s ingredients, and one for the recipe’s directions.
Use your second HTML file and add this starting code:
<div class="ui move reveal">
  <div class="visible content">
    <div class="ui card">

    </div>
  </div>
  <div class="hidden content">
    <div class="ui card">

    </div>
  </div>
</div>
Here, we use a Reveal component, which have two sections: for visible and for hidden content. For each section, we put an empty Card component. We also add some CSS – we give some space around the recipe card and we use a lightgrey color to distinguish the cards. We override the style for the Reveal to have a width of 290px to match the default width of the Card component, and we set white-space property to normal in order to wrap the long lines inside the card. Also, we give a card a height of 420px.
body {
  margin: 30px;
  background-color: lightgrey;
}

.ui.move.reveal {
  width: 290px;
  white-space: normal;
}

.ui.card {
  height: 420px;
}
Now, let’s add the code for the visible card:
<img class="ui image" src="http://mrg.bz/TRRrQJ">
<div class="content">
  <div class="header">Pizza Margherita</div>
  <div class="description">Invented in Naples in honor of the first queen of Italy, the Margherita pizza is the triumph of Italian cuisine in the world.</div>
</div>
<div  class="extra content" >
  <div class="ui labeled icon menu">
    <a class="item"><i class="wait icon"></i>2h 16min</a>
    <a class="item"><i class="food icon"></i>6 servings</a>
    <a class="item"><i class="signal icon"></i>Easy</a>
  </div>
</div>
First, we put the image for the recipe. Next, we use a content section to show the title and description for the recipe. And finally, we use a Menu component inside the extra content section, to display details for the recipe – preparation time, the number of servings, and difficulty level. The only thing left to do about this front card is to tweak the appearance of the menu to display evenly its three parts.
Also we lower the font size a bit and adjust the padding to have more space at right and left and less at top and bottom.
.ui.labeled.icon.menu .item{
  min-width: 33.3333%;
  max-width: 33.3333%;
  font-size: 0.8em;
  padding: 6px 2px;
}
Great. Now you can test it. It works fine, but we need to add the content for the hidden card:
<div class="content">
  <div class="ui pointing secondary menu">
    <div class="item active" data-tab="ingredients">Ingredients</div>
    <div class="item" data-tab="directions">Directions</div>
  </div>
  <div class="ui tab active" data-tab="ingredients">

  </div>
  <div class="ui tab" data-tab="directions">

  </div>
</div>
Here, we use a Tab component, with conjunction with Menu component, to create tabs for the Ingredients and Directions lists.
To activate the Tab component we need to use the following jQuery code:
$( document ).ready(function() {
  $('.menu .item').tab();
});
Now the tabs are working, but the content is missing. Let’s add the content of the first tab:
<h3>For pasta</h3>
<div class="ui list">
  <div class="item"><i class="check circle red icon"></i>2 lb Italian "00" flour or all-purpose flour</div>
  <div class="item"><i class="check circle red icon"></i>1 oz fresh yeast</div>
  <div class="item"><i class="check circle red icon"></i>2 cups water</div>
  <div class="item"><i class="check circle red icon"></i>⅜ oz salt</div>
</div>
<h3>For dressing</h3>
<div class="ui small list">
  <div class="item"><i class="check circle red icon"></i>½ cup extra virgin olive oil</div>
  <div class="item"><i class="check circle red icon"></i>1 lb mozzarella cheese</div>
  <div class="item"><i class="check circle red icon"></i>basil leaves to taste</div>
  <div class="item"><i class="check circle red icon"></i>1 lb canned tomatoes</div>
  <div class="item"><i class="check circle red icon"></i>salt to taste</div>
</div>
And now, let’s add the content for the second tab:
<div class="ui small list">
  <div class="item"><span class="ui red circular label">1</span> On a wooden...</div>
  <div class="item"><span class="ui red circular label">2</span> Knead the dough...</div>
  ...
  <div class="item"><span class="ui red circular label">8</span> Once ready...</div>
</div>
Here, for brevity, I don’t give the full list of directions. See the final result below for the full version.
The last thing we need to do is to add some CSS to display the things correctly. First, we set the cursor to pointer when we hover over the tabs. Next, we set the height of the tabs to 320px and overflow-y property to auto in order to show a scrollbar when the list gets too long as this happens with the Directions list.
.ui.pointing.menu {
  cursor: pointer;
}

.ui.tab {
  height: 320px;
  overflow-y: auto;
}
Perfect. Now everything should work correctly. You can see the final result here JS Bin
Summary
So far we’ve seen two examples showing the practical implementation of the card-based design pattern. Along the way, we explored Semantic UI’s card components and how we can use it to implement different kinds of cards-based design. Now you can continue experimenting with your own ideas.
And for those of you who are fans of Bootstrap, the good news is their next major release will provide a built-in card component too.
Frequently Asked Questions on Designing Rich Card-Based Layouts with Semantic UI
How can I customize the color of my Semantic UI card?
Semantic UI provides a variety of classes that allow you to customize the color of your card. For instance, you can use the class “red” to make your card red. To do this, simply add the class to your card’s div like so: <div class="ui red card">. You can replace “red” with any color you prefer. Remember, Semantic UI’s color classes are not limited to cards, you can use them to customize the color of any Semantic UI component.
Can I use Semantic UI with React?
Yes, you can use Semantic UI with React. There’s a version of Semantic UI specifically designed for React called Semantic UI React. It provides the same UI components as Semantic UI but in a more React-friendly way. You can use it to create rich card-based layouts in your React applications. To get started, you need to install it using npm or yarn and then import the components you need into your React components.
How can I add an icon to my Semantic UI card?
Adding an icon to a Semantic UI card is straightforward. First, you need to include the icon’s class in an “i” element. Then, you place this “i” element where you want the icon to appear in your card. For example, to add a user icon to your card, you would do something like this: <div class="ui card"><i class="user icon"></i></div>. Semantic UI provides a wide range of icons you can use, each with its own class.
Can I use Semantic UI to design responsive layouts?
Yes, Semantic UI is designed with responsiveness in mind. It provides a grid system that you can use to create layouts that adapt to different screen sizes. This grid system is based on flexbox, a CSS layout module that makes it easy to design flexible responsive layout structures. With Semantic UI’s grid system, you can specify how many columns a row should have on different devices, and the grid will automatically adjust the layout accordingly.
How can I add a flag to my Semantic UI card?
Semantic UI provides a “flag” component that you can use to add a flag to your card. To do this, you need to include the flag’s class in an “i” element, just like you would do with an icon. Then, you place this “i” element where you want the flag to appear in your card. For example, to add a US flag to your card, you would do something like this: <div class="ui card"><i class="us flag"></i></div>. Semantic UI provides a flag for almost every country, each with its own class.
How can I add a header to my Semantic UI card?
Adding a header to a Semantic UI card is as simple as adding a “div” element with the class “header” inside your card. For example, to add a header that says “My Card”, you would do something like this: <div class="ui card"><div class="header">My Card</div></div>. You can style this header as you wish using Semantic UI’s classes or your own custom CSS.
Can I use Semantic UI to design card-based layouts for mobile apps?
Yes, you can use Semantic UI to design card-based layouts for mobile apps. Semantic UI’s components are designed to be responsive, which means they adapt to different screen sizes. This makes them suitable for use in mobile apps. However, keep in mind that Semantic UI is a CSS framework, so you’ll need to use it in conjunction with a technology that allows you to build mobile apps with HTML, CSS, and JavaScript, such as Cordova or React Native.
How can I add an image to my Semantic UI card?
To add an image to a Semantic UI card, you need to include an “img” element with the class “image” inside your card. The “src” attribute of this “img” element should be set to the URL of the image you want to add. For example, to add an image from a URL, you would do something like this: <div class="ui card"><img class="image" src="image_url"></div>. You can style this image as you wish using Semantic UI’s classes or your own custom CSS.
How can I add a button to my Semantic UI card?
Adding a button to a Semantic UI card involves including a “button” element with the class “ui button” inside your card. For example, to add a button that says “Click Me”, you would do something like this: <div class="ui card"><button class="ui button">Click Me</button></div>. You can style this button as you wish using Semantic UI’s classes or your own custom CSS.
Can I use Semantic UI with Angular?
Yes, you can use Semantic UI with Angular. However, there’s no version of Semantic UI specifically designed for Angular, like there is for React. This means you’ll need to use Semantic UI’s jQuery-based components in your Angular applications, which can be a bit tricky. If you prefer to use Angular-friendly components, you might want to consider using a UI library that’s specifically designed for Angular, such as Angular Material or NG Bootstrap.
 Ivaylo Gerchev
I am a web developer/designer from Bulgaria. My favorite web technologies include SVG, HTML, CSS, Tailwind, JavaScript, Node, Vue, and React. When I'm not programming the Web, I love to program my own reality ;)